--
其實PPA耳擴是小弟剛進入耳機領域
第一個想玩的線路
(PPA耳擴的網頁:http://tangentsoft.net/audio/ppa/)
不過一直弄不到此耳擴的PCB
而最近在某機緣下弄到此PCB
所以還是想圓一下當初的夢


首先.還是從電源談起...
雖然稱簡易版
但穩壓沒因此使用最簡易的三端子穩壓
依然使用習慣的UCC雙電源穩壓
若是觀賞過小弟M2耳擴文章
不難發現此兩塊穩壓用料搭配有點類似
(當然還是有差別)

第一塊穩壓是供應驅動級的穩壓

整流子使用IXYS出品的高速整流子
PCB底下並上0.01uF小電容
整流完的濾波電容使用金色ROE電容

OPAMP使用中性的LME49710NA

輸出使用NCC電容

第二塊穩壓是供應功率級的穩壓

整流子用料一樣是IXYS出品的高速整流子

輸出電容

其他內部用料倒是跟第一塊差不多

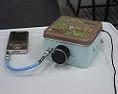
接下來就是變壓器...
之所以稱簡易版以下的照片大致可以驗證了

此話並不是嫌藍殼變壓器如何
藍殼變壓器是滿好用的
小弟的機子幾乎全年無休
變壓器都好端端的
品質相當不錯
而相較於M2,變壓器大小真的差別不小
(待續...)